
Preparing 5-Node Kubernetes Cluster
To get started with Kubernetes, follow the below steps:
- Open https://labs.play-with-k8s.com/ on your browser
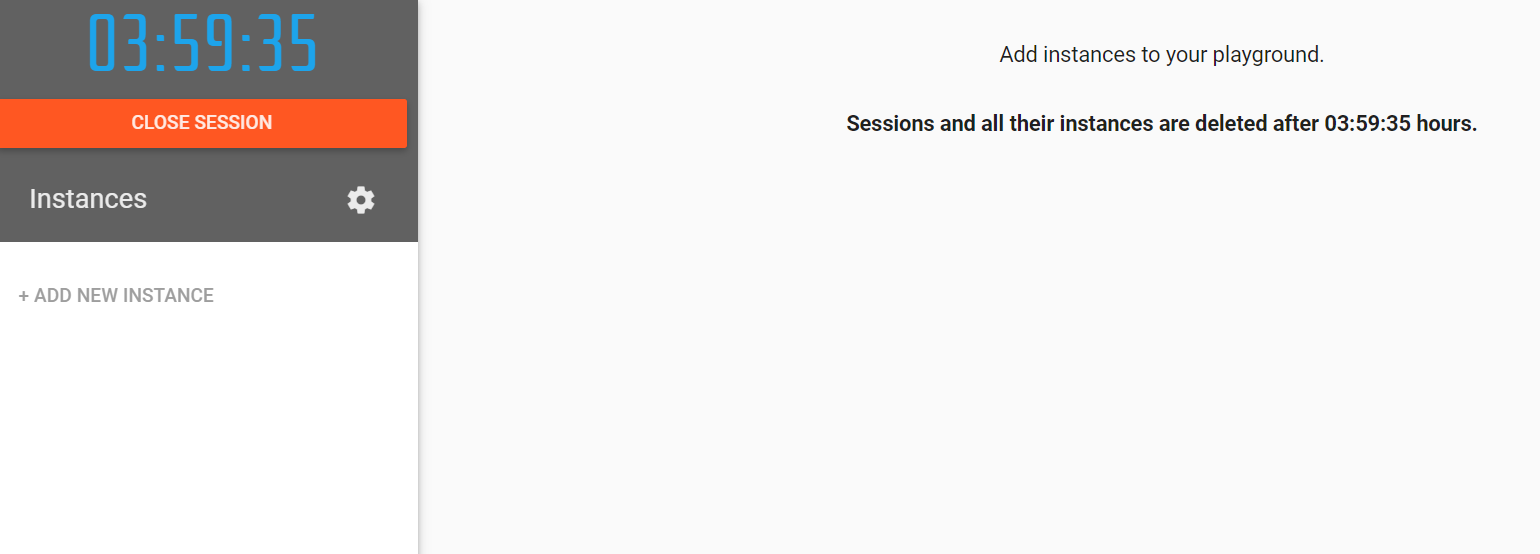
Click on Add Instances to setup first k8s node cluster
Cloning the Repository
git clone https://github.com/collabnix/kubelabs
Bootstrapping the First Node Cluster
Change to the kubelabs directory and change mode executable for bootstrap.sh
cd kubelabs
chmod a+x bootstrap.sh
sh bootstrap.sh
What does this script do?
The first line kubeadm init initializes a Kubernetes control-plane node and execute the below phases:
The “init” command executes the following phases:

preflight                    Run pre-flight checks
kubelet-start                Write kubelet settings and (re)start the kubelet
certs                        Certificate generation
  /ca                          Generate the self-signed Kubernetes CA to provision identities for other Kubernetes components
  /apiserver                   Generate the certificate for serving the Kubernetes API
  /apiserver-kubelet-client    Generate the certificate for the API server to connect to kubelet
  /front-proxy-ca              Generate the self-signed CA to provision identities for front proxy
  /front-proxy-client          Generate the certificate for the front proxy client
  /etcd-ca                     Generate the self-signed CA to provision identities for etcd
  /etcd-server                 Generate the certificate for serving etcd
  /etcd-peer                   Generate the certificate for etcd nodes to communicate with each other
  /etcd-healthcheck-client     Generate the certificate for liveness probes to healthcheck etcd
  /apiserver-etcd-client       Generate the certificate the apiserver uses to access etcd
  /sa                          Generate a private key for signing service account tokens along with its public key
kubeconfig                   Generate all kubeconfig files necessary to establish the control plane and the admin kubeconfig file
  /admin                       Generate a kubeconfig file for the admin to use and for kubeadm itself
  /kubelet                     Generate a kubeconfig file for the kubelet to use *only* for cluster bootstrapping purposes
  /controller-manager          Generate a kubeconfig file for the controller manager to use
  /scheduler                   Generate a kubeconfig file for the scheduler to use
control-plane                Generate all static Pod manifest files necessary to establish the control plane
  /apiserver                   Generates the kube-apiserver static Pod manifest
  /controller-manager          Generates the kube-controller-manager static Pod manifest
  /scheduler                   Generates the kube-scheduler static Pod manifest
etcd                         Generate static Pod manifest file for local etcd
  /local                       Generate the static Pod manifest file for a local, single-node local etcd instance
upload-config                Upload the kubeadm and kubelet configuration to a ConfigMap
  /kubeadm                     Upload the kubeadm ClusterConfiguration to a ConfigMap
  /kubelet                     Upload the kubelet component config to a ConfigMap
upload-certs                 Upload certificates to kubeadm-certs
mark-control-plane           Mark a node as a control-plane
bootstrap-token              Generates bootstrap tokens used to join a node to a cluster
kubelet-finalize             Updates settings relevant to the kubelet after TLS bootstrap
  /experimental-cert-rotation  Enable kubelet client certificate rotation
addon                        Install required addons for passing Conformance tests
  /coredns                     Install the CoreDNS addon to a Kubernetes cluster
  /kube-proxy                  Install the kube-proxy addon to a Kubernetes cluster
It also adds a CNI plugin called kube-router using kubectl apply -f https://raw.githubusercontent.com/cloudnativelabs/kube-router/master/daemonset/kubeadm-kuberouter.yaml
You can select any CNI plugin as per your requirement using: https://kubernetes.io/docs/concepts/cluster-administration/addons/
Adding New K8s Cluster Node
Click on Add Instances to setup first k8s node cluster
Wait for 1 minute time till it gets completed.
Copy the command starting with kubeadm join ..... We will need it to be run on the worker node.
In case you missed to copy the token, you can use kubeadm token create –print-join-command This will generate the new token which can be used to add the token lateron
Setting up Worker Node
Click on Add New Instance and paste the last kubeadm command on this fresh new worker node.
[node2 ~]$ kubeadm join --token 4f924f.14eb7618a20d2ece 192.168.0.8:6443 --discovery-token-ca-cert-hash sha256:a5c25aa4573e06a0c11b11df23c8f85c95bae36cbb07d5e7879d9341a3ec67b3
You will see the below output:
[kubeadm] WARNING: kubeadm is in beta, please do not use it for production clusters.
[preflight] Skipping pre-flight checks[discovery] Trying to connect to API Server "192.168.0.8:6443"
[discovery] Created cluster-info discovery client, requesting info from "https://192.168.0.8:6443"
[discovery] Requesting info from "https://192.168.0.8:6443" again to validate TLS against the pinned public key
[discovery] Cluster info signature and contents are valid and TLS certificate validates against pinned roots, will use API Server "192.168.0.8:6443"[discovery] Successfully established connection with API Server "192.168.0.8:6443"
[bootstrap] Detected server version: v1.8.15
[bootstrap] The server supports the Certificates API (certificates.k8s.io/v1beta1)
Node join complete:
* Certificate signing request sent to master and response
  received.
* Kubelet informed of new secure connection details.

Run 'kubectl get nodes' on the master to see this machine join.
[node2 ~]$
Verifying Kubernetes Cluster
Run the below command on master node
[node1 ~]$ kubectl get nodes
NAME      STATUS    ROLES     AGE       VERSION
node1     Ready     master    15m       v1.10.2
node2     Ready     <none>    1m        v1.10.2
[node1 ~]$
Adding Worker Nodes
[node1 ~]$ kubectl get nodes
NAME      STATUS    ROLES     AGE       VERSION
node1     Ready     master    58m       v1.10.2
node2     Ready     <none>    57m       v1.10.2
node3     Ready     <none>    57m       v1.10.2
node4     Ready     <none>    57m       v1.10.2
node5     Ready     <none>    54s       v1.10.2
[node1 istio]$ kubectl get po
No resources found.
[node1 ]$ kubectl get svc
NAME         TYPE        CLUSTER-IP   EXTERNAL-IP   PORT(S)   AGE
kubernetes   ClusterIP   10.96.0.1    <none>        443/TCP   1h
[node1 $
Show the capacity of all our nodes as a stream of JSON objects
kubectl get nodes -o json |
      jq ".items[] | {name:.metadata.name} + .status.capacity"
Accessing namespaces
By default, kubectl uses the default namespace. We can switch to a different namespace with the -n option
List the pods in the kube-system namespace:
kubectl -n kube-system get pods
[node1 kubelabs]$ kubectl get pods -n kube-system
NAME                            READY   STATUS    RESTARTS   AGE
coredns-6dcc67dcbc-4sw6m        1/1     Running   0          2m15s
coredns-6dcc67dcbc-x4qnk        1/1     Running   0          2m15s
etcd-node1                      1/1     Running   0          108s
kube-apiserver-node1            1/1     Running   0          84s
kube-controller-manager-node1   1/1     Running   0          104s
kube-proxy-9gljr                1/1     Running   0          2m5s
kube-proxy-9zktt                1/1     Running   0          2m15s
kube-proxy-qvqrf                1/1     Running   0          107s
kube-scheduler-node1            1/1     Running   0          105s
weave-net-78bxz                 2/2     Running   0          2m15s
weave-net-g2cf6                 2/2     Running   0          2m5s
weave-net-hxqd9                 0/2     Evicted   0          19s
What are all these pods?
- etcd is our etcd server
- kube-apiserver is the API server
- kube-controller-manager and kube-scheduler are other master components
- kube-dns is an additional component (not mandatory but super useful, so it’s there)
- kube-proxy is the (per-node) component managing port mappings and such
- weave is the (per-node) component managing the network overlay
The READY column indicates the number of containers in each pod.
Pods with a name ending with -node1 are the master components (they have been specifically “pinned” to the master node).